|
||||||||
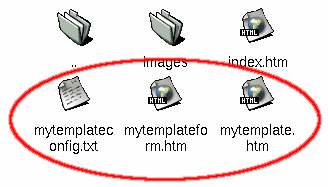
Soupermail Template TutorialTemplates are one of the most useful features of Soupermail, and allow you to change the look and feel of everything Soupermail creates. Once you can use templates, you can do all kinds of crazy things. This tutorial assumes that you've installed Soupermail correctly, and that you have already succeeded in writing a working form with Soupermail. If you haven't, please do the Config File Tutorial. This tutorial has 10 steps and should take about 40 minutes to complete. It will be helpful to have 2 browser windows open while doing the tutorial, one to view this page with, and one to test your forms in. Step 1The first step is to understand that templates are just files that you can create in your favourite editor (eg. HomeSite, DreamWeaver, Emacs, vi, notepad, etc). The thing that makes templates special is that you can put certain tags in them that Soupermail uses. Step 2First, we'll make a simple form. Make up a form like the one below, and save if as mytemplateform.htm on your server. <html> Make sure that you change the form's action to the correct value for where Soupermail is installed on your server. Note that the name of the text field is mytext. We're going to use this name in Step 5, so make sure you remember it. Step 3Now, we'll make a config file for the form to use. Make a file like the one below, and save it as mytemplateconfig.txt. success: mytemplate.htm Step 4Finally, we'll make the template itself. Make up a file like the one below and save it as mytemplate.htm. <html> Can you see the <output> tag? Soupermail will use this tag to fill in a piece of the template. Notice how the name attribute of the output tag is mytext. You should remember it from Step 2. Step 6By now, you should have the following files on your server:
Step 7Now its time to test the form. Open up a web browser window, and view mytemplateform.htm on your server. Type something into the form and submit it. If all goes well, you should see the text you typed appear in the template. If it worked, well done, you've successfully made a Soupermail template. Step 8You may have thought that you've got templates done, but there's one more thing to be aware of - preventing people using Javascript in your templates. Return to the form, and type the following into the text box, and submit the form. <script language=javascript>alert('this is very bad');</script> Did you get a little Javascript alert box when you submitted the form? You should know that this is VERY bad. People should not be able to inject their Javascript into pages on your site unless you REALLY know what's going on. If you don't understand why this is bad, you should read and understand this CERT notice. Don't even think of proceeding with this tutorial unless you understand the danger. Step 9Thankfully, Soupermail provides a means of protecting us against Cross site scripting. Open the mytemplate.htm template file in an editor, and change the output tag to: <output name="mytext" type="html"> Now save the template. Do you see the type attribute? This tells Soupermail what kind of thing the template is creating (in this case, a HTML page). For HTML pages, Soupermail escapes out dangerous characters so people can't send in Javascript to your templates. Step 10Now try sending the Javascript from Step 8 into your form again. You should see that the template returns all the text you typed safely. That completes this tutorial on templates, covering the basics of the output tag. Here are the files that were used: Next StepsThis tutorial should have shown you how to use some features of the output tag. There are many attributes that can be used with output tags to alter the format of the data, all of which are covered in the Attributes section of the manual. You should read the section and play with some of the output attributes. Remember, this tutorial shows how templates are used for the return HTML page, but templates can also be used to control the output of email and files. Also, templates don't just have to be HTML, they can be anything you want (eg. WML for WAP browsers). You should try using templates for your emails. Templates offer a number of other tags, such as <only> and (from version 1.0.8) <loop>. You should read the manual about these and try them out. |
